Testing HPCloud
I had the opportunity to have an invitation code to testdrive the HP Public Cloud Services (HPCS) Beta Platform a few weeks ago and I thought I could share my experimentation with you. Users familiar with Amazon EC2 should quickly be confortable with the interface and the API as the concepts are the same. OpenStack users should feel at ease since HP Public Cloud Services is built on Openstack.
Before going any further, please note that at time of writing access to usage of the beta platform is limited and available on invitation only basis. But everyone can request an invitation code so take the time to read the Welcome to HP Cloud Services private beta here are a few things to know before signing-up to the service.
Signing-up to HPCS
As usual, the first thing to do before being able to use the service is to signup to the service which will create your user account.
Point your browser to the HPCS Sign up page and fill in the form. If your application is accepted, you will receive your invitation code by email.
Once you receive your invitation code, open the URL contained in the email and you’ll be presented the following screen
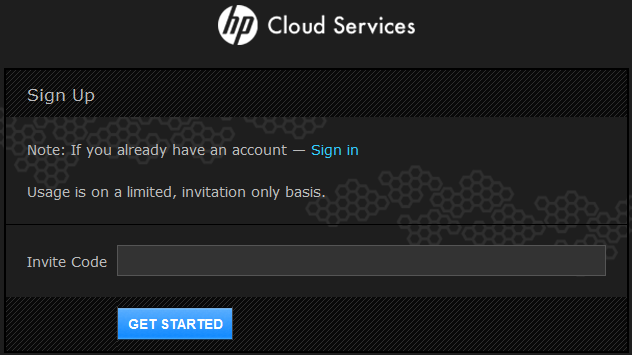
After entering your invitation code and clicking “Get Started”, fill and submit the identification form. You’ll then receive an email like the following:
Thanks for completing your account registration! Your HP Cloud Services free private
beta account has been activated.

Now you're ready to explore all the features available within HP Cloud. Check out the
Getting Started video for a quick step-by-step on how to begin.

If you need help, online chat and user forums are available. HP Cloud Services
representatives are available Monday-Friday, 7am to 7pm CST at cloudsupport@hp.com
or 888-616-0708. You can also email us at cloudsales@hp.com to provide feedback or
share an idea.

Log in to explore the HP Cloud and let us know what you think.

The HP Cloud Services Team
Next you need to activate services. At time of writing, three services are available:
- HP Cloud Compute services
- az-1.region-a.geo-1
- az-2.region-a.geo-1
- HP Cloud Object Storage services
- region-a.geo-1
To activate a service, simply click on the “Activate Now” button.

After submitting the web form, another form is presented which allow you to create a virtual machine.
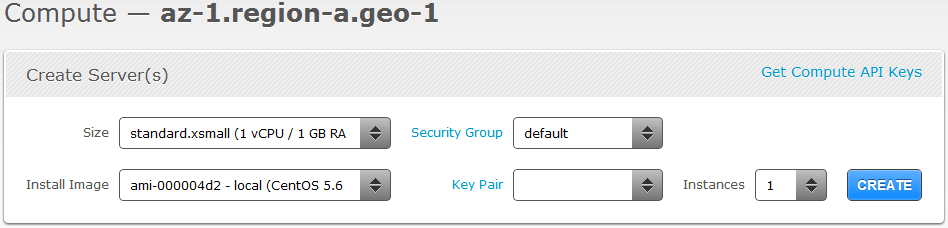
Before creating virtual machines, let’s create a security group and a key pair
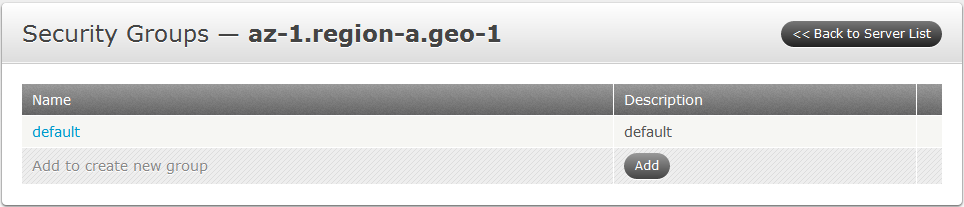
Creating a Security Group
To create a Security Group, click on the blue “Security Group” link shown on the previous image. The following form appears.
I created mine with the following name and description

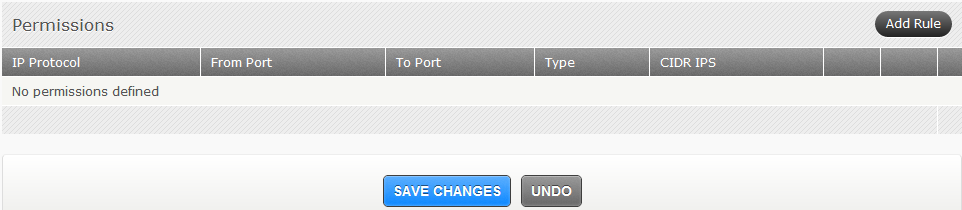
After clicking create, the following warning is presented
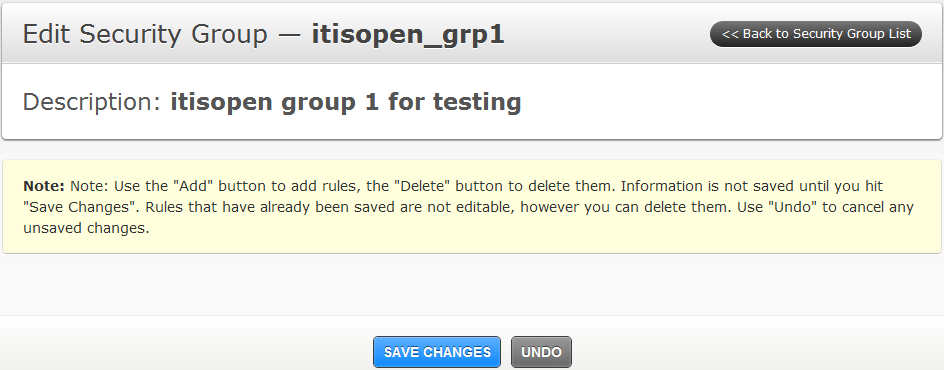
And below it, you can add authorization rules by clicking on the “Add Rule” button located on the top right corner.
The new rule form appears
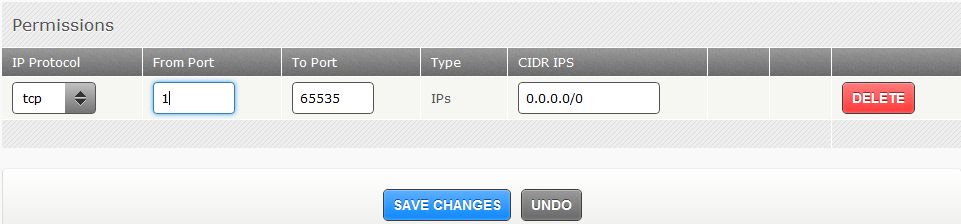
The rule below will allow ssh access from any internet host.
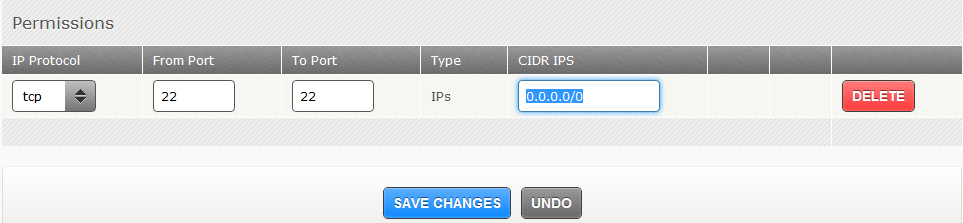
Next click the “Save changes” button of this form and then the “Save changes” button at the top of the page. Finally, click the “Back to Security Group List” button on the top right corner of the page, then the “Back to Server List”.
Once back to the “Create Server” form, select the security group you just created.
Creating a Key Pair
Click on the blue “Key Pair” link. The following form appears. Enter a key pair name and click the “Create” button.

The private key appears. Select the key and paste it in a new file on your computer. You will need it to connect to your virtual server. Next click the “Back to Server List” button on the upper right corner.

Creating the virtual server
At time of writing, six virtual machine sizes are available:
| VM Size | VCPU | RAM | HDD |
|---|---|---|---|
| standard.xsmall | 1 | 1 | 30 |
| standard.small | 2 | 2 | 60 |
| standard.medium | 2 | 4 | 120 |
| standard.large | 4 | 8 | 240 |
| standard.xlarge | 4 | 16 | 480 |
| standard.2xlarge | 8 | 32 | 960 |
And only Linux OS flavors are available:
- ami-000004d2 - local (CentOS 5.6 Server 64-bit 20111207)
- ami-000004d4 - local (Ubuntu Lucid 10.04 LTS Server 64-bit 20111212)
- ami-000004d6 - local (Ubuntu Maverick 10.10 Server 64-bit 20111212)
- ami-000004d8 - local (Ubuntu Natty 11.04 Server 64-bit 20111212)
- ami-000004da - local (Ubuntu Oneiric 11.10 Server 64-bit 20111212)
- ami-0000054e - local (CentOS 6.2 Server 64-bit 20120125)
- ami-00000551 - local (Debian Squeeze 6.0.3 Server 64-bit 20120123)
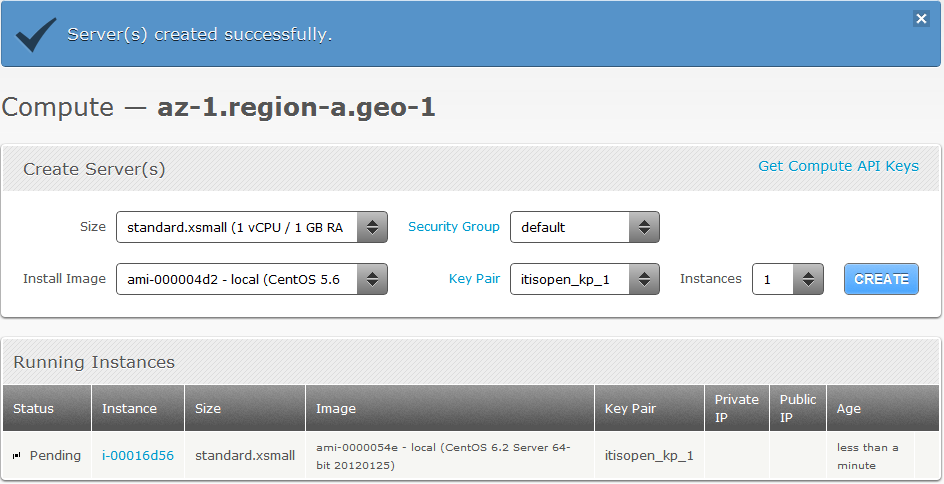
As an example, I will create an extra small VM running CentOS 6.5 Server 64-bit.

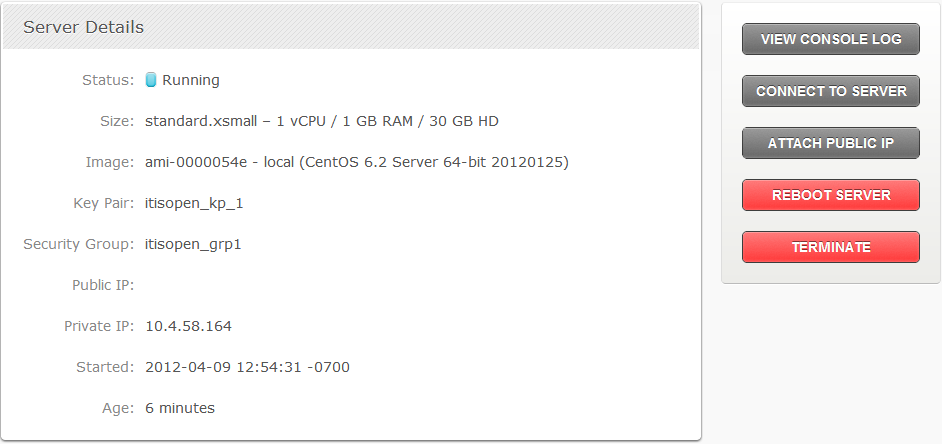
After clicking the “Create button”, the next page appears. As you can see, the instance as been created but it got no public IP attached so it will be impossible to access it from the internet.
We will fix this by clicking on the instance ID link and then on the “Attach Public IP” button on the right side.
After a few seconds, the public IP address will be showed on the same page.
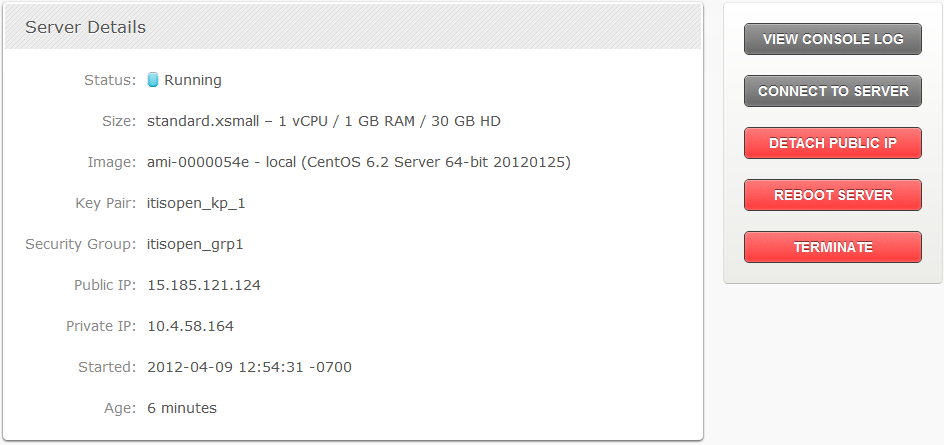
And finally, click on the “Connect to Server” button to display the instructions. Make sure you replace the IP address and private key name with your details.

Wrap up
Keep aways (at time of writing):
- HP Clous Services are currently in private beta. Access is subject to invitation but anyone can request invitation code and may be lucky to get one.
- After signing up, you have to activate services. Currently to types of services are available: compute and object storage.
- Before creating compute resources, create a security group and a key pair. Make sure you allow ssh access in your security group if you want to access your server from the internet.
- Six server models and only Linux OS flavors are available.
- After creating your VM, make sure you attach a public IP address
In the next post I will detail my experimentations with the API so stay tuned!
To go further…
Here are some additional ways to help you get started:
blog comments powered by Disqus